Kategorie: Arcade Cabinets

  • cleanup and restoration of a vintage Atari 4.5Zoll Trackball

    I got replacement parts for my Monster Trackball a vintage original 4 Zoll (real 4.5 Zoll) Atari Trackball. It was used in Atari Football and Missile Command.

    First I have to dissaemble it. cleaning was necassary with ethyl-alcohol and soap.

    Atari4.5Zoll_Trackball (0)

    I changed the handles, 5 bearings , and Opto PCBs too.

    Now it is running like in 1978 🙂

    Atari4.5Zoll_Trackball (8)

    Now Its waiting to find its final place in my new arcade cabinet …

  • some Infos about the turning area of Retroarcade

    Hi Folks,
    here you can find some pictures of the rotating parts needed to make the retroarcade turnable.
    retro_turning_pcb

    he build in turning PCB is capable to turn the screen via one signal
    on = turn to vertical
    off = turn to horizontal

    I handle it via a a conductor and a keyboardencoder. Here I am using the led for SCR to output the signal

    This PCB makes the degauss

    powered with 230V  (Europe) and with the help of  the two PTCs

    retro_degauss

    Here you see the rotating mechanisem from backsite (not much)

    retro_back

  • Retroarcade complete adhesive

    Today I finished my first Retroarcade with complete adhesive film.

    Here you can see some pictures.

    First the panels:

    panel

    After this I tried the frontdoor

    With the help of water and a scraper

    front_door_1

    front_door_2

    front_door_4

    I uses a lot of water to make it easier to position the film:

    folie_01

    I am using a black „edding“ for the edges of the t-molding. So you didn’t see any yellow wood if the t-molding is not 100% in the middle.

    edding

    The laydown of the Cabinet… after some some smooth and polish… at the cabinet site

    laydown

    First try if the adhesive fits

    first-position

    with a lot of water between the adhesive and the cabinet and the help of two men

    it works great

    doing1

    doing2

    some time later

    finish

    cutting the edges with a cutter knife:

    cutted

    Here you can see some pictures including bezel, marquee, t-molding.. and CP without RGB-Leds..

    final_view_1

    final_view_2

    final_view_3

    final_view_4

    final_view_5

  • Balltop milky white with RGB-LED

    today I received the balltop for my Sanwa JLF-TP-8YT Stick.

    Here you can see a milky white balltop 37,5mm diameter with 6mm insert for use in arcadesticks.
    You will find a RGB-Led inside for make all colours you wish

    On the left site you will see a standard red balltop.

    In the middle the milky one, right the milky one with LED on:

    balltop_milky_blue2

    balltop_milky_blue1

    balltop_milky_green

    Video

  • Rare Quadro Magnum Project

    Hi Folks,

    after polish the good old Jumbo Quadro Games Cabinet, I found a bigger one a rare cabinet called: Quadro Magnum.

    There are different advantages over the Jumbo Cabinet:

    a) I can use a digital Multisync CRT-Monitor like the Wells-Gardner 27 Zoll instead of the analog 25 Zoll Multisync CRTs

    b) the controlpanel is really big, so I can make use of more toys 🙂

    c) its a sitdown

    d) a negative point is the width is around 83cm and a lot of door are only 80 cm 🙁

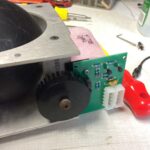
    e) turns the screen like all Quadros via motor 😉

    It will take some time to finish this project, because its for me and I have a lot other work to do at the moment.

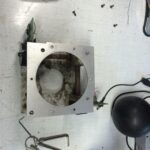
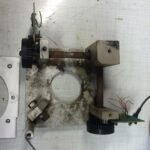
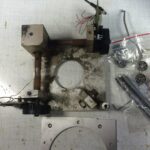
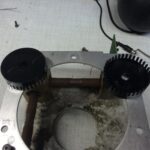
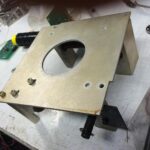
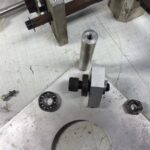
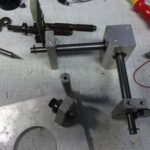
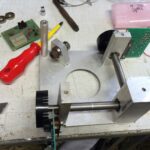
    Here the first pictures:

    magnum (1) (Large)

    magnum (6) (Large)

    magnum (11) (Large)

    what have I done until now:

    a) orderd new glasses for marquee an bezel

    b) asked the panelmaker willi for a new CP

    to do:

    a) what is needed on this big controlpanel

    1-2 trackball,

    1-2 spiner, or crazy 4 spiner for games like warlords…

    2-4 sticks?

    analog stick?

    a lot of buttons

  • Retroarcade lifting

    Thank to Alex from cologne, I got a Cinema4D Object of the Quadro Games Jumbo Arcade Cabinet. And it was time play with it,  to show whats possible to make.

    Here you can see the old look:

    retroArcade_Cabinet_quadro_look_1

    Here some tests:

    retroArcade_Cabinet_01

    retroArcade_Cabinet_02

    retroArcade_Cabinet_03

    retroArcade_Cabinet_04

    retroArcade_Cabinet_05

    space_look